User Manual
Table of contents
1 General information for parents
1.1 Registration
1.2 Logging in
1.3 Adding children
1.4 Account management
1.5 Forgot your password?
1.6 Help with questions
2 Scheduling an appointment with a teacher
2.1 Menu
2.2 Filtering teachers
2.3 Scheduling an appointment
2.4 Printing an appointment list
3.1 Entering appointments manually
3.2 User management
3.3 Importing teachers
3.4 Creating TANs
4.1 Managing students
4.2 Scheduling the day of the parent-teacher conference
1 General information for parents
The following screenshot shows the home page of the parent-teacher conference application.
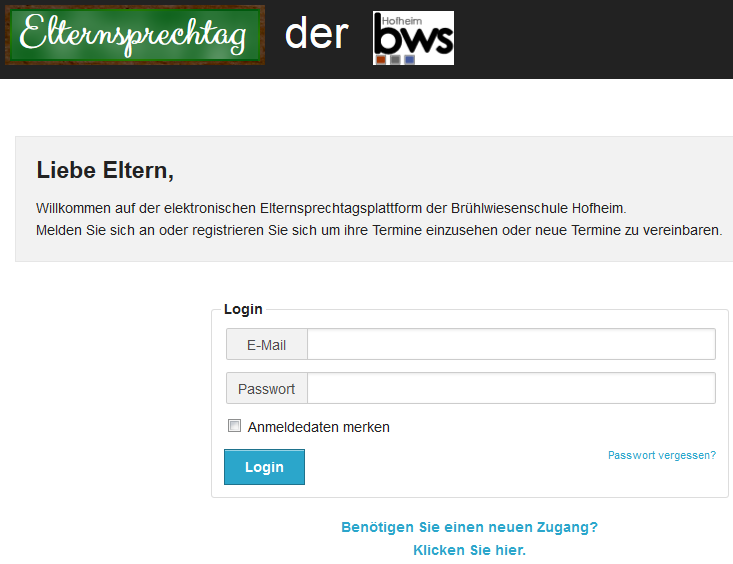
Fig. 1: Home Page
1.1 Registration
The user can register on the home page by clicking on “Benötigen Sie einen Zugang? Klicken Sie hier.”

Fig. 2: Registration link.
On the next page, the user has to fill in all fields marked in red. When indicating an email address, it is important to enter a valid one since an activation link will be sent via this address. The password has to consist of eight characters and must be repeated once. The TAN is given to the user by the child’s teacher and consists of six digits.
After entering all necessary data, the user has to click on the button marked “Registrieren”.

Fig. 3: Registration page.
He will subsequently receive an email containing a registration link. Upon receipt of this email, the user has to click on the enclosed link, afterwards he may log in via the home page.
1.2 Logging in
Once the registration process is finished, the user can log in on the home page by entering his email address and password and clicking on the “Login” button.
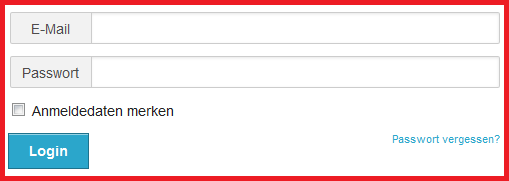
Fig. 4: Log in page.
1.3 Adding children
After the first login procedure, the user is asked to enter one or several children by clicking on the button “Schüler hinzufügen”. If this is done at a later stage, the user then first has to click on the menu button “Ihre Kinder”.
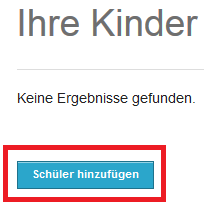
Fig. 5: Adding children (1).
The user subsequently enters the child’s first name and surname and clicks on “Anlegen”.
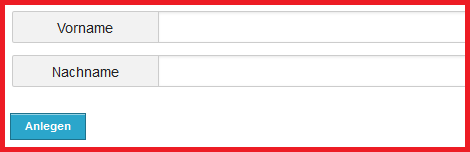
Fig. 6: Adding children (2).
1.4 Account management
The user may manage his account by clicking on the menu button and choosing the item “Ihr Account”.

Fig. 7: Menu: „Ihr Account“.
The account’s user data appear. If the user wishes to change them, he has to click on the button marked “Benutzer bearbeiten”, leading him to the following page:
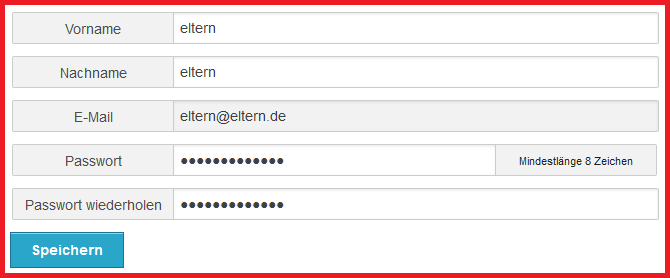
Fig. 8: Account management page.
Here, the user can change his data and save them via the “Speichern” button.
1.5 Forgot your password?
In case the user cannot remember his password, he can click on the following link on the home page:
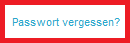
Fig. 9: Forgot your password? (1)
On the next page, he has to enter his email address and the generated security code and click on “Absenden”.
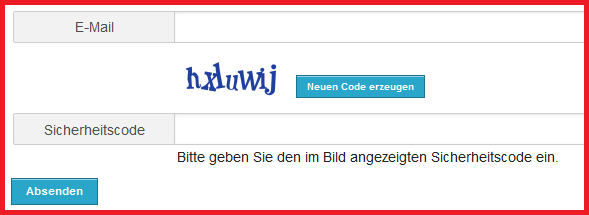
Fig. 10: Forgot your password? (2)
The user will then receive an email to the indicated address, containing a link to a page where he can define a new password.
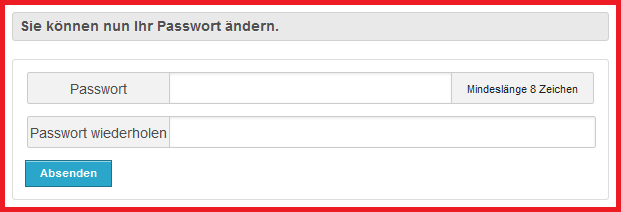
Fig. 11: Change Password
1.6 Help with questions
If the user has questions concerning the use of the parent-teacher conference software, he can click on the link marked “Kontakt” situated on the bottom right side.

Fig. 12: Link: „Kontakt“.
The following page will appear:
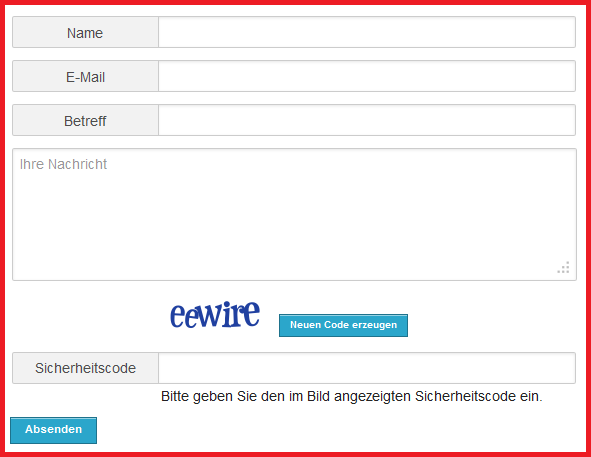
Fig. 13: Contact page.
On this page, the user has to fill in all fields in order to receive an answer to his question. After entering all necessary information, he clicks on “Absenden”.
2 Scheduling an appointment with a teacher
2.1 Menu
In order to schedule an appointment, the user has to click on the menu button “Termin festlegen”, giving access to the menu shown below:

Fig. 14: Menu: Scheduling appointments.
2.2 Filtering teachers
There are two possibilities to find a teacher: First, one may click on a letter, thus obtaining a list with all teachers whose surname starts with the selected initial letter. Second, one may search for the teacher’s name via a text box.
In both cases, a list of teachers whose surname starts with the chosen initial letter will be displayed.
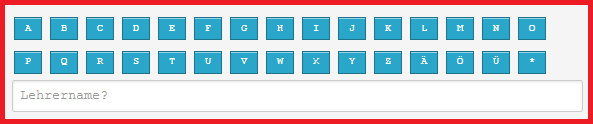
Fig. 15: Filtering teachers.
The user can choose a teacher by clicking on his/her name.
2.3 Scheduling an appointment
After the user has chosen a teacher, the software shows his/her schedule. Appointments are marked “UNAVAILABLE” or “AVAILABLE”.

Fig. 16: Teacher’s schedule.
By clicking on a time slot marked “AVAILABLE”, the grey fields of the following screenshot are filled in automatically. In case several of the user’s children go to the same school, he will subsequently have to select a child, otherwise the child is selected automatically.
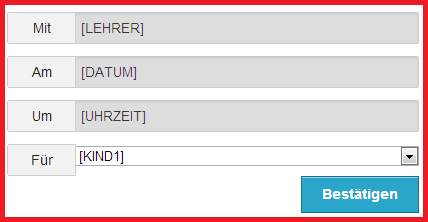
Fig. 17: Appointment information.
2.4 Printing an appointment list
In order to print out a list of all scheduled appointments, the user needs an installed printer. In the menu, he has to click on the button “Ihre Termine” to access the corresponding page (which is also displayed directly after the login procedure).

Fig. 18: Print button
By clicking on the “Print” icon, the user opens another window where he may choose the printer. The process is finished by clicking on the button marked “Drucken”.
3 School administration
3.1 Entering appointments manually
The school administration may add appointments manually, the corresponding page being automatically selected upon logging in. One has then to click on the button “Termin anlegen”, opening a new page.
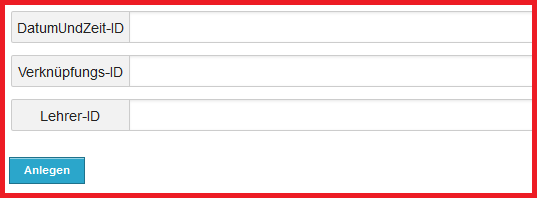
Fig. 19: Making appointment manual
Once all necessary fields have been filled in, one has to click on “Anlegen” in order to save the appointment.
3.2 User management
The user management offers several features.
First, it lists all available user information in a detailed overview, accessible via the magnifying glass icon on the left.
The second feature is the deletion of the user account by using the recycle bin icon on the right. When clicking on the icon, the user has to confirm the deletion by answering a security question.

Fig. 20: Icons.
The last feature allows the user to edit his data via the pencil icon in the middle. By clicking on it, the following window appears:
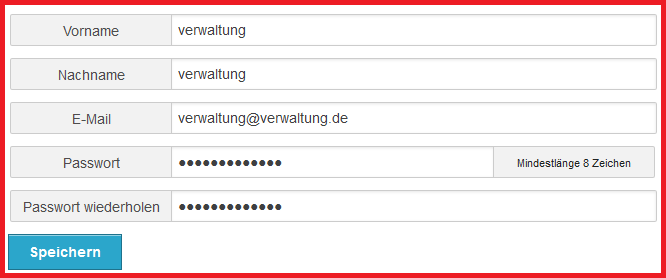
Fig. 21: User management page.
On this page, the user may change his data. Upon updating the information, changes are submitted by clicking on the button marked “Speichern”.
3.3 Importing teachers
In order to enter a list of teachers, the user has to click on the button “Lehrer importieren”.
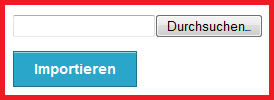
Fig. 22: Importing teachers.
By clicking on the button “Durchsuchen”, the user opens a window where he can select a .csv file. To import data, it is necessary to fill in the columns surname, first name, email address and title while at the same time paying attention to their order. The email column is optional; in case it is missing in the .csv file, the email addresses will be generated automatically.
Once a file is selected, the user has to click on the button “Importieren”.
3.4 Creating TANs
If the teacher or the administration would like to generate TANs, they have to click on “Tanverwaltung” in the menu.

Fig. 23: Menu: TAN management.
Upon selecting the button “Tan generieren”, the following window appears:
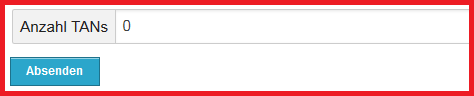
Fig. 24: Page: TAN generation.
The user has to enter the number of TANs he would like to generate; the minimum is set at one, the maximum at 100 TANs.
4 Software administration
4.1 Managing students
In order to access the student management page, the administrator has to click on the button marked “Schülerverwaltung”.

Fig. 25: Menu: Student management.
A list of all students appears. Their data may be updated the same way as the user data (described in part 3.2). A new student is created by clicking on the button “Schüler anlegen”, which opens the following window:
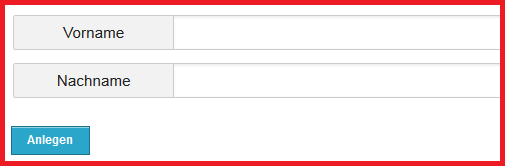
Fig. 26: Student management page.
On this page, the user has to enter the student’s first name and surname and then click on “Anlegen”.
4.2 Scheduling the day of the parent-teacher conference
If an administrator logs in, this page is immediately displayed. He may also click on the menu button „Elternsprechtagsverwaltung“, showing a list of all existing parent-teacher conferences.
To create a new parent-teacher conference, the user has to click on the button “Elternsprechtag erstellen”, opening the window shown below:
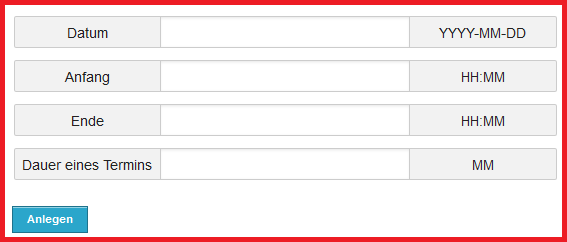
Fig. 27: Page: Administration.
The fields determining the date, start time, end time and duration of an appointment are compulsory and have to be entered in the form shown on the right. After entering the information, the user has to click on “Anlegen”.